
Like many hams, I have a scanner installed in my vehicle along with my radios. It’s great for keeping tabs on what’s going on around the area. The newer models of scanner from the major players (Uniden, Whistler, etc) typically have GPS capabilities to lock/unlock scanning banks depending on your location. This is super convenient, especially when you travel across states frequently as I do.
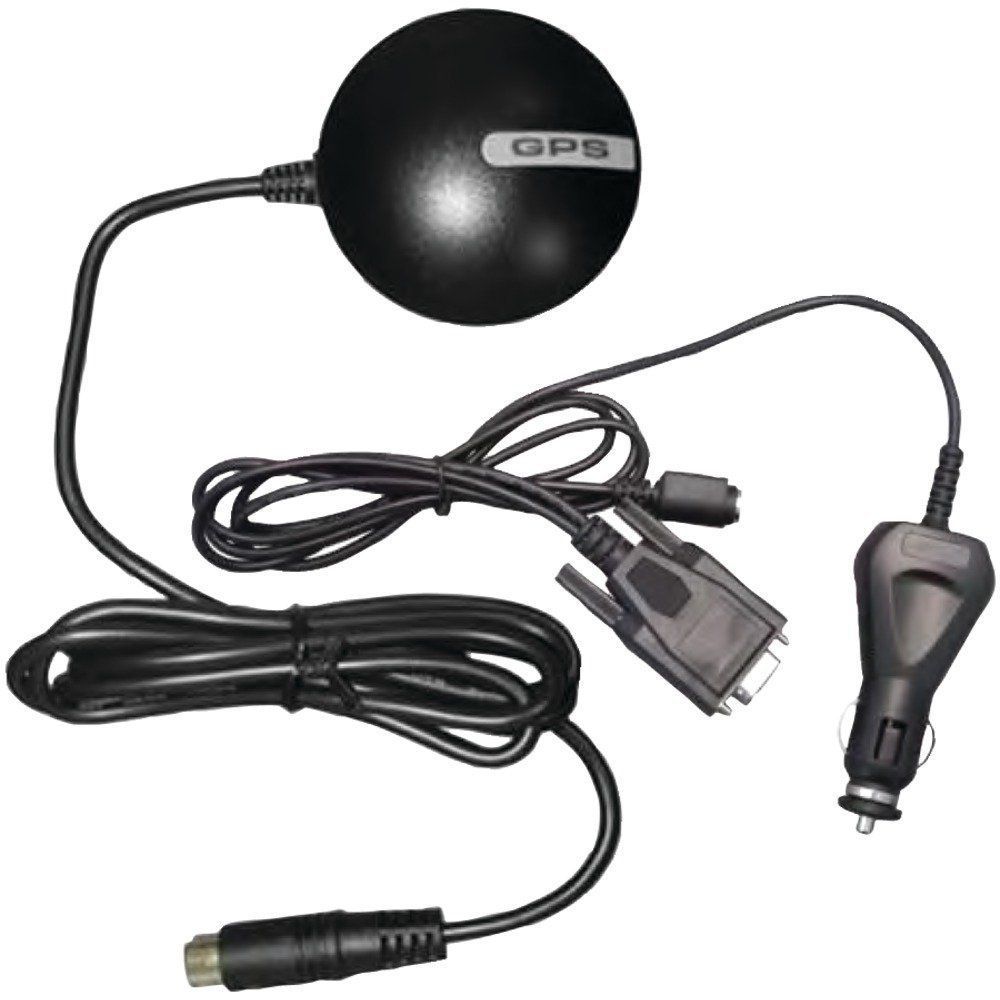
I own a BCD996P2 that I picked up secondhand from a friend a few years ago. It came with the standard Uniden “puck” GPS receiver, which plugs into the scanner’s rear DB9 port and includes a 12V accessory plug for a vehicle. Not the most elegant solution, but it works.
Recently, however, my GPS module died of unknown causes. One day it simply stopped powering up. A future post might dive into the internals to see what went bad, but in the meantime I wanted to cook up a solution that wasn’t going to cost me $80 for a new OEM module.
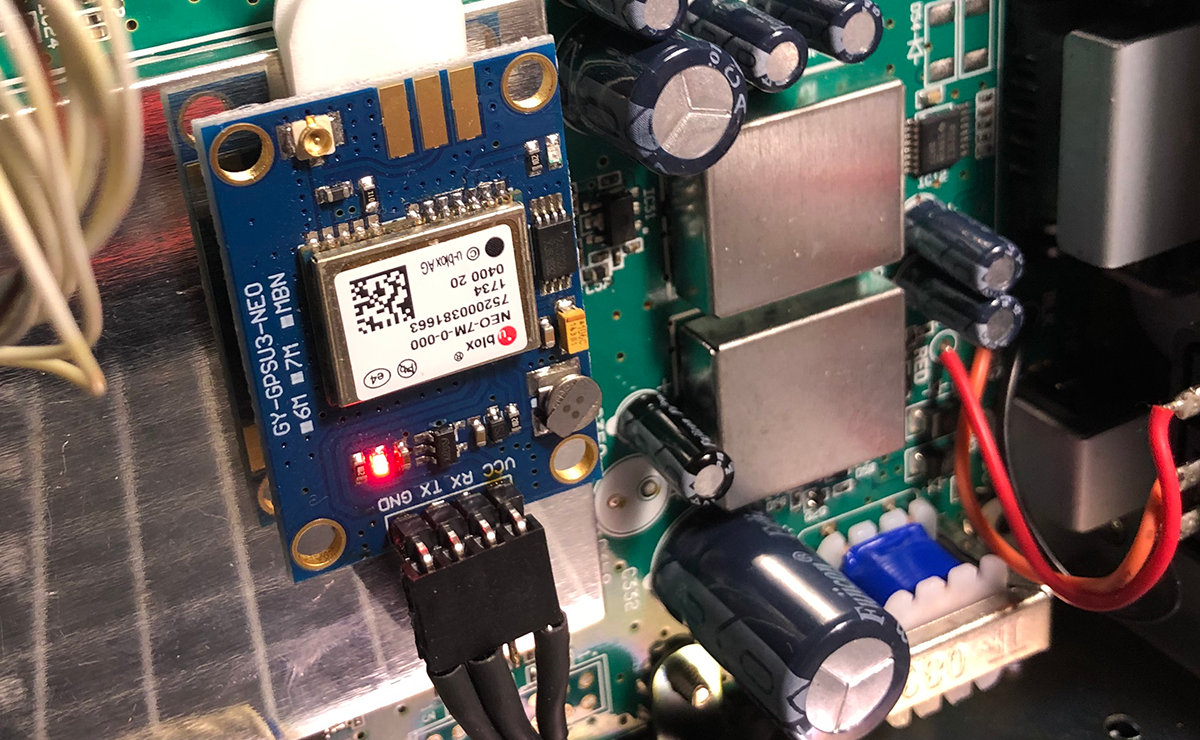
I happened to have several small GPS modules lying around from some ongoing projects. These are readily available on your favorite less-than-reputable online marketplace, and typically have uBlox NEO-xM modules installed. As it happens, they run on 3.3-5V, output TTL NMEA data, and are around 1 inch by 1 inch or so. Perfect for stuffing inside a small enclosure, or scanner…

So, after a little reading, I found that the most common method of adding “alternative” GPS sources to Uniden scanners is to patch into the RS-232 side of the serial port using a MAX232 level converter. RadioReference member jonwienke has a fantastic thread with several experiments using this method over on the RR forums. However, I didn’t have any MAX232 modules on hand, and I wanted a solution as soon as possible. Thankfully, there’s a second way to approach things.
The Mod
We know BCD996P2 takes in RS-232 GPS data via its rear serial port. However, almost every modern MCU takes in TTL-level signals, and would quickly let the smoke out if fed with the +/- 7V (or more) that are typically present in true RS-232 signals. If we add up 2+2, we know that there must be internal level conversion going on somewhere inside the scanner. I was fully prepared to hunt all around both sides of the board for pins to tap into in order to break out the data lines.
However, after tearing down the unit, I found that Uniden was extremely nice to future would-be hackers. They very kindly broke out the RS-232 TX and RX lines to test points right next to both the DB9 connector and the level conversion IC (a TRS3221E, for reference). After probing these lines with my scope, I realized that this mod was going to be dead-simple. The two test points expose the TX/RX lines after conversion to +3.3V TTL levels. That means that all we need to do is run a wire from the NEO-6M module’s TX line to the scanner’s RX line, along with power and ground, and we’re done.
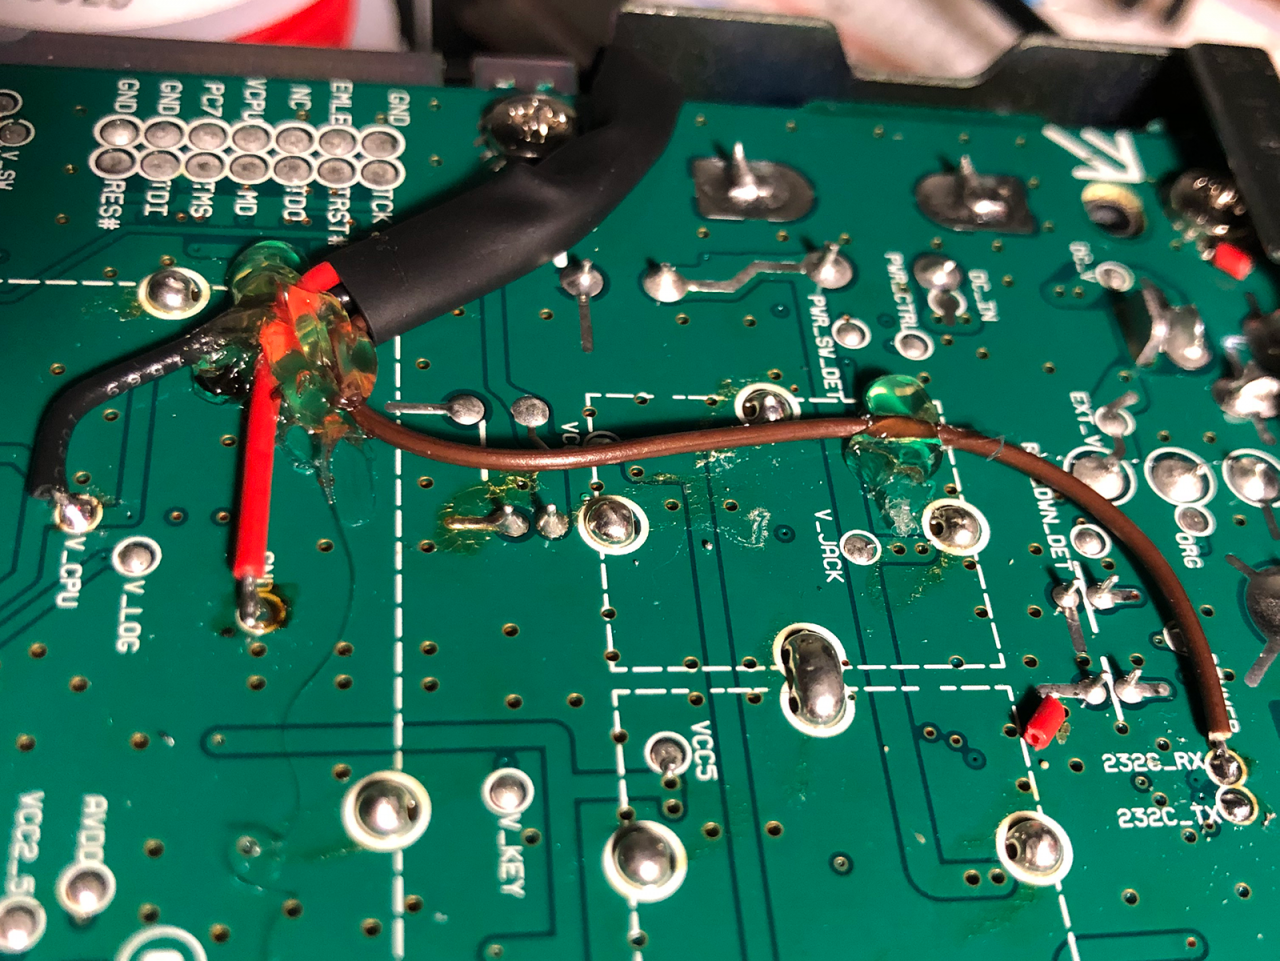
After finding a suitable power tap for 3.3V (I used the V_CPU test point) and running a ground wire to the nearest ground pad, I powered up the scanner to see whether it would smoke my module or not. Nothing blew up immediately, so I continued on.
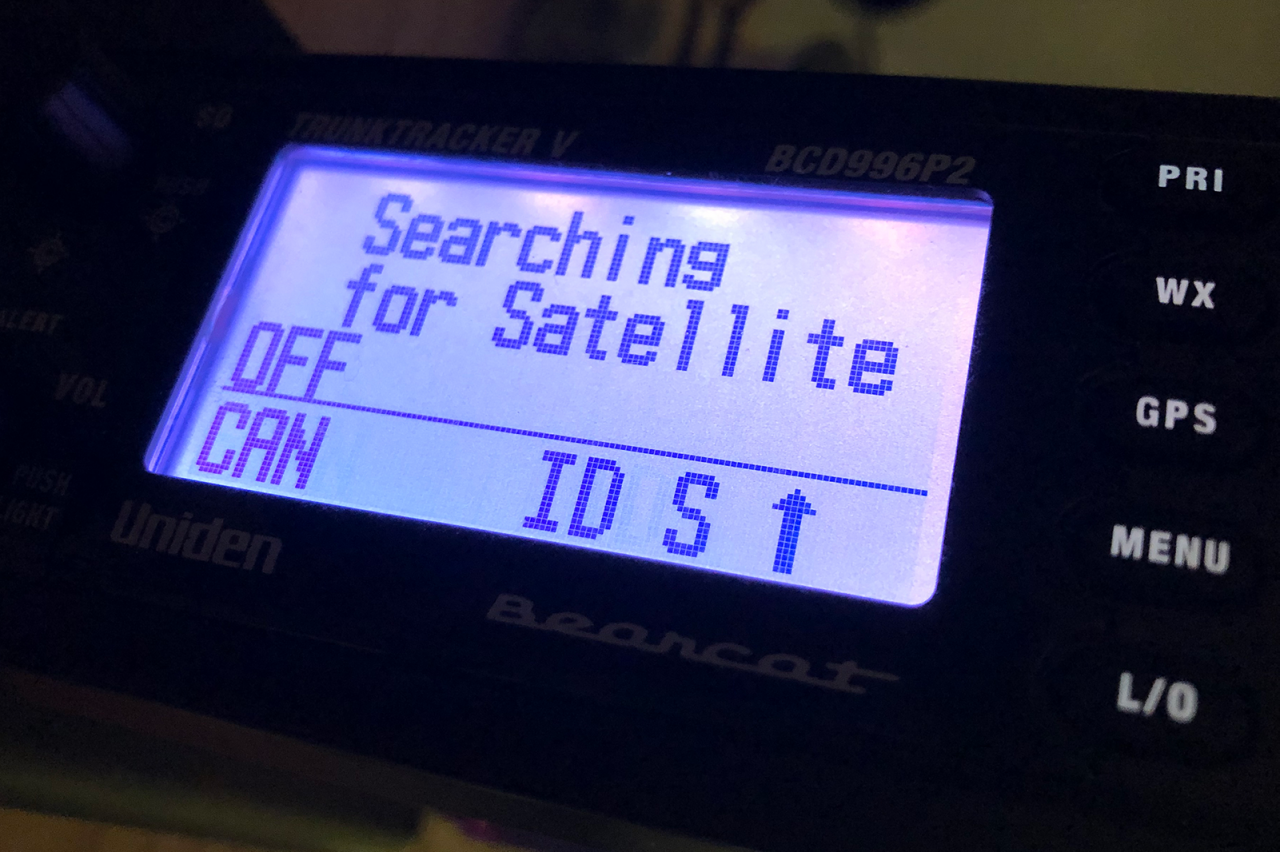
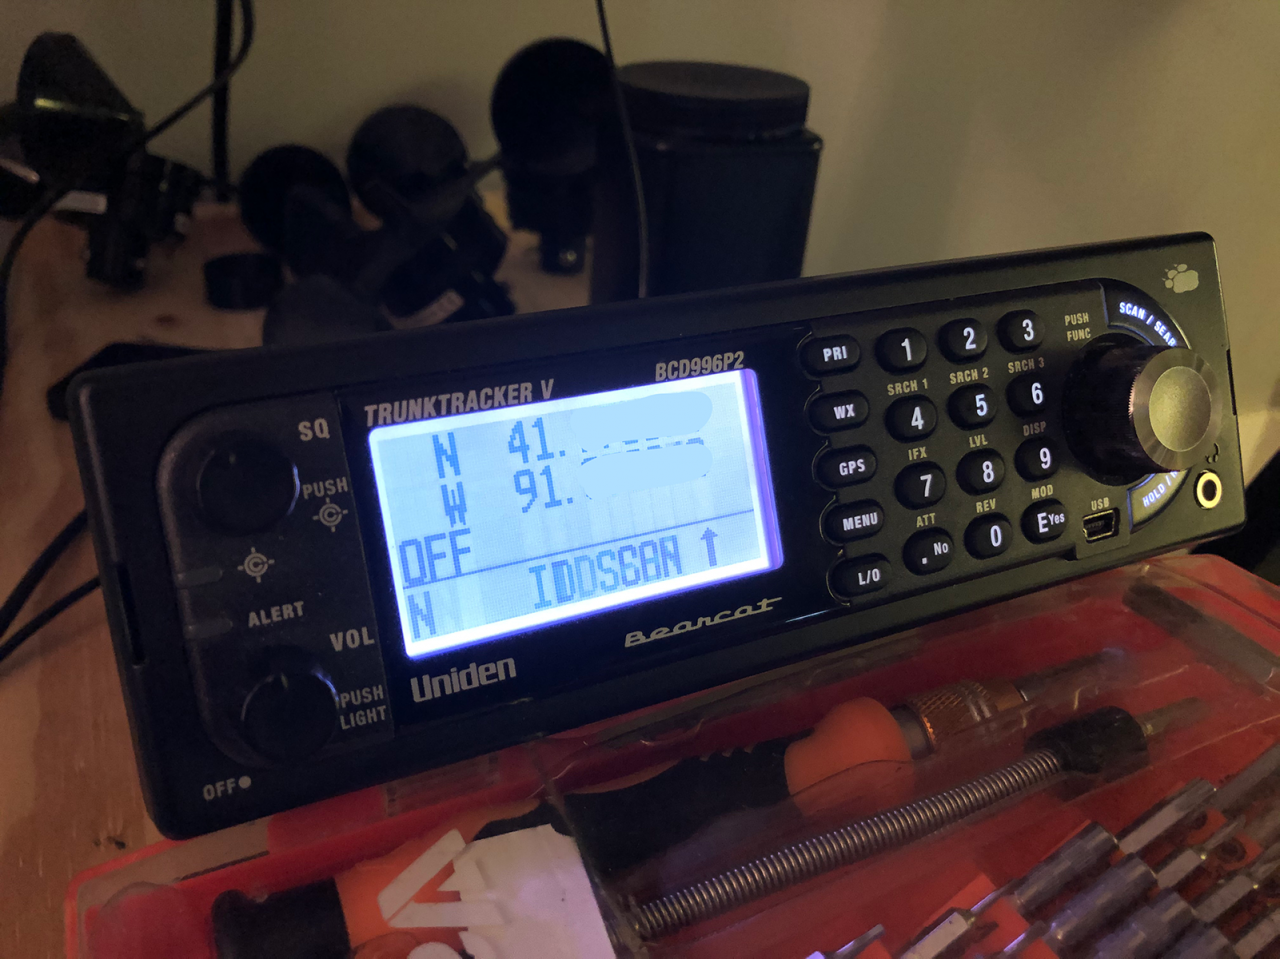
I had to change the GPS baudrate from the default 4800bd to 9600bd (the NEO-6M default), but after that I was greeted with the above image. The scanner was talking to the GPS just fine, which meant all I had to do now was clean things up and hook up an antenna.

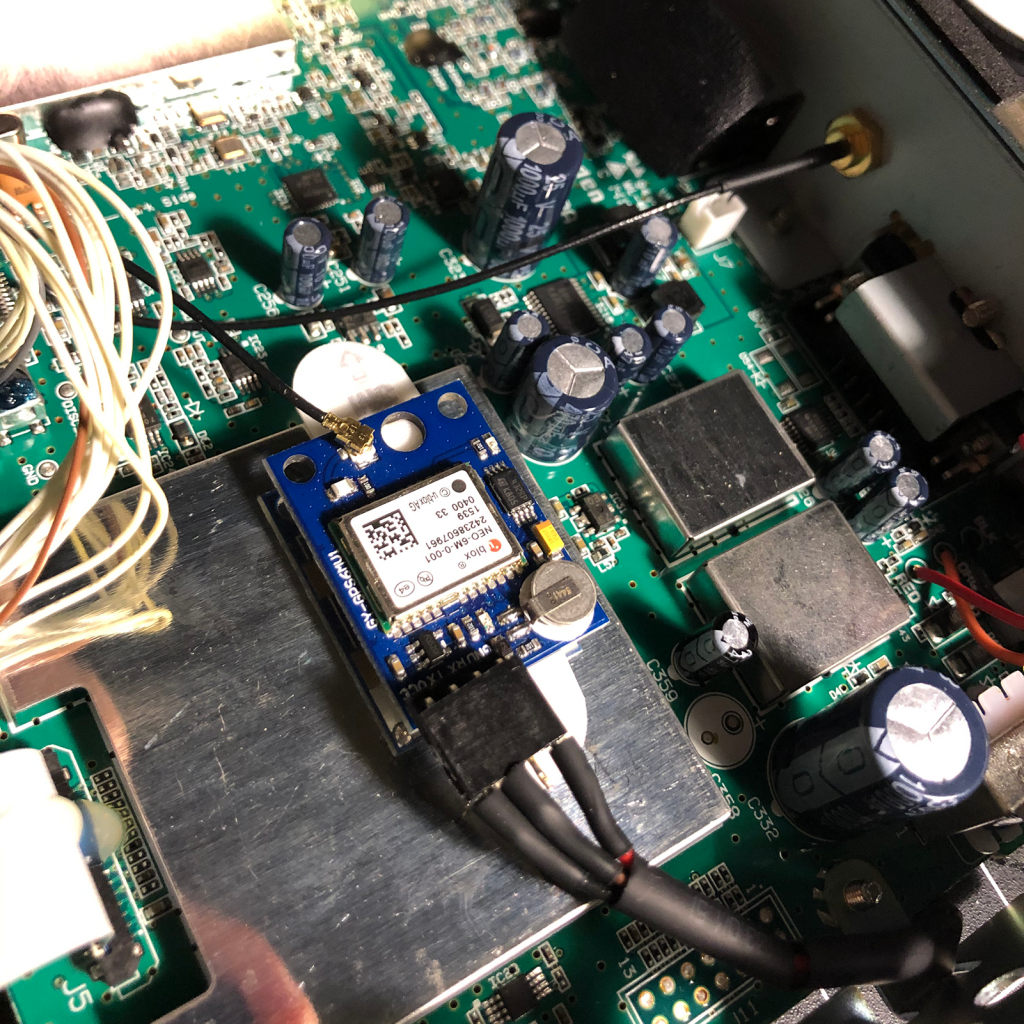
I routed the antenna connector through a hole I drilled in the back of the case. Originally, this area was where the rear M4 mounting hole was located. I never needed to mount anything there, and I’m not entirely sure why it’s there in the first place, so a 1/4-inch drill bit gave me a nice clean mounting point for the SMA bulkhead. Once that was done, and the unit was put back together, it was time to test it out!
Like I said earlier, this was probably one of the fastest mods I’ve done. Total time was a little over two hours from start to finish. The first module I tried ended up being a dud – it was outputting serial data at 3100baud, which is a totally non-standard data rate and I’m not entirely sure why that is. After swapping in a new unit (with a different pinout, because nothing is ever too easy) we were in business.
Wrapping Up
It goes without saying, but I offer no gaurantees if you decide to perform this mod yourself. There’s any number of weird things that could go wrong to easily break your scanner, and it’s nobody’s fault but your own if you manage to do that.
For a little more detailed info, check out my wiki page on this mod. Feel free to comment here with any questions, suggestions, or concerns, and I’ll try and respond!
Thanks for reading, and 73 for now!
I like the idea of having the GPS module in the radio and only having a GPS antenna outside rather then the entire puck. I feel like getting a decent GPS antenna would make for better GPS reception. Just curious, with the change in baud rate, do you see a difference in the scanners response to the GPS turning systems on/off, etc.? I’ve made so many mods to my BCD996P2 what’s one more? I built a repeater that transmits any high or low band received from the scanner onto a UHF frequency and any UHF/700/800 reception on a high band frequency. (no interference trying to repeat the same band). I then monitor the two frequencies simultaneously on a dual band full duplex portable. I use it all the time at work, which is why I love the GPS changing all my preprogrammed systems automatically. I can also turn everything on/off from the portable with DTMF tones. It’s a hobby, I think I’ve rebuilt it 3 or 4 times over the years. Any ways, thanks for the info on the internal GPS, I’ll probably take a stab at it. Right now my GPS plugs into the RS-232 and right next to that I installed a 5v jack for the power wire that comes off of the RS-232. I did not want to deal with a cigarette lighter since it’s not temporary.
I just want to pass this info tidbit along. My best friend installed a metal roof, and now his GPS can’t pick up the satellite signals, so apparently the metal roof blocks the satellite’s signal from reaching the GPS unit.
So in order to get the GPS to work he’d need to use an outdoor antenna.