
There comes a time in some hams’ lives when they’re faced with a dilemma. They can’t drill their car, the mag mounts are getting old very fast, and trunk lip mounts just won’t cut it. The misguided of the lot go towards glass-mount or fender-mount antennas, and settle for poor performance and high losses. The more adventurous, well, we get creative. So if you’re like me and you want to mount a whole bunch of antennas to your car but don’t want to drill the roof, this is the story you want to read.
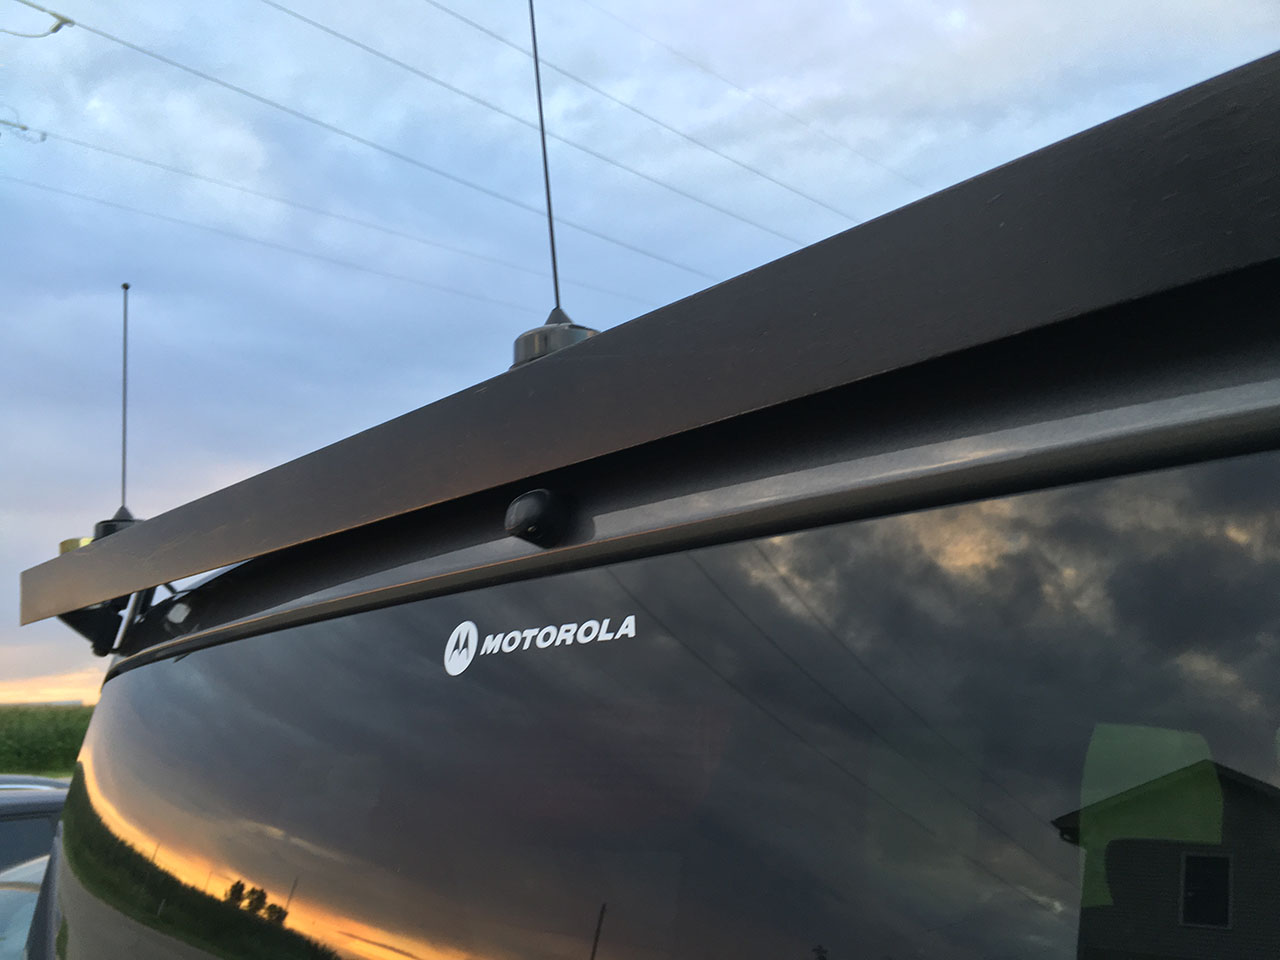
If you’ve read my previous post, you know that I’ve been running two Comet RS-720 lip-mount NMO antenna mounts. These things are great, and I’d happily buy another one to mount my new 800MHz/2.4GHz antenna. However, on my current vehicle there is no more space to put any more lip mounts. The way the trunk hinges open, there are only two good mounting locations for the 720s and they’re both now occupied. I needed a better solution. I started thinking hard about what I could do using my existing setup to mount more antennas, and I quickly thought up a rough plan. I’d use the existing lip mounts as supports for a new metal bar that would span the rear of the vehicle, and on the bar I could mount any number of 3/4″ NMO mounts for antennas. My “finalized” plan is below:

I already had some of the hardware required, including the 3/4″ bolts and nuts, two of the three NMO mounts, and the existing two quarter wave antennas. What I needed was a rigid metal beam of some kind that would be light and thin enough to cut with hand tools, while still being strong enough to support itself and the weight of three antennas across a span of almost 5 feet. It was off to Lowe’s to find a suitable piece of metal for the application.
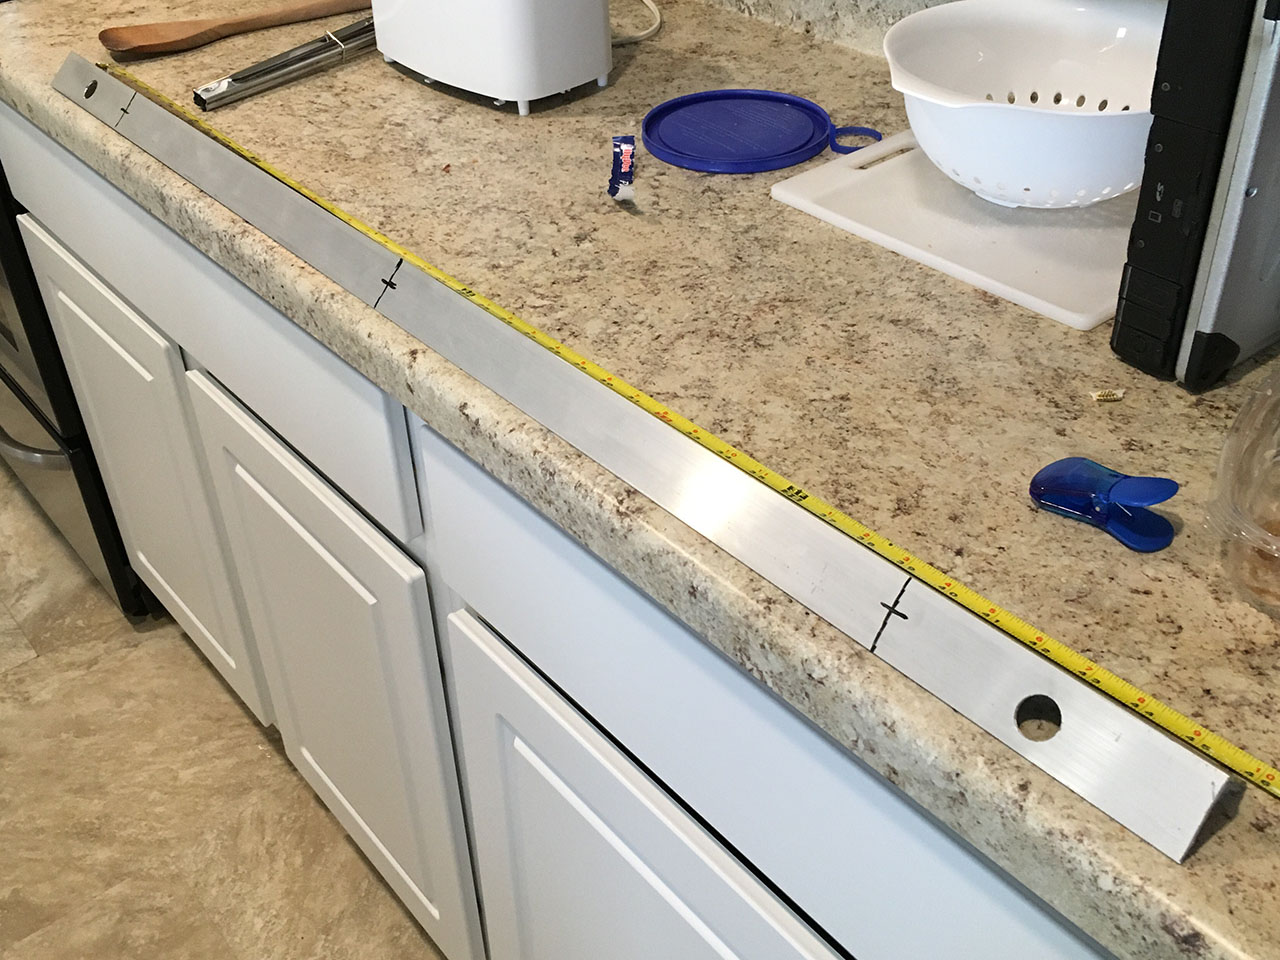
I found a pretty cheap piece of 1.25 x 1.25 angle aluminum stock. Cost me about $10, and along with some paint and a bigger hole saw (mine stopped right before 3/4″) the plan was in action. Let me tell you, cutting and forming aluminum in a small apartment is not the most fun task I’ve ever undertaken. There were still chips of aluminum in my carpet a month later! After a bit of sweat and careful cutting, the bar was the right length and the holes were in exactly fairly close to the right spots. Of course while some people may like the rustic aluminum oxide look, I prefer a much cleaner appearance, so it was off to the balcony for a few coats of black satin. Unfortunately my impatience got the best of me, and the finish isn’t my best work, but this isn’t a beauty pageant and I’m not a stickler for looks. Off it went for final assembly and mounting.

Using the existing trunk mounts for my original antennas, the new bar was a drop-in replacement. With a bit of persuasion it was all mounted up and the grossly oversized bolts were torqued down tight. The bar was complete.
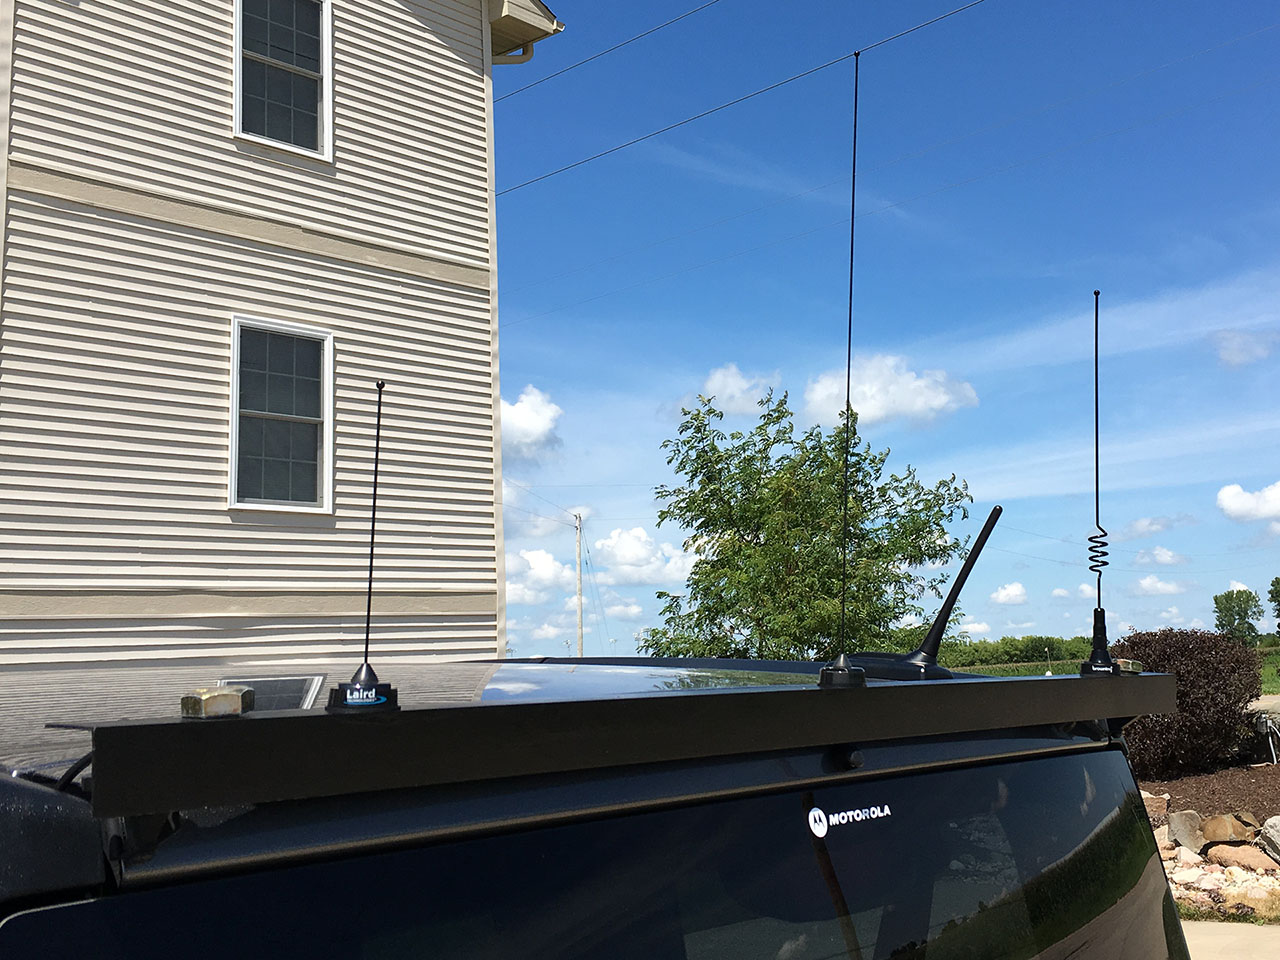
Now, some of you might say, “but isn’t that a terrible groundplane for a VHF quarter-wave?” Yes, absolutely. I’ve got plenty of ferrites on my feedline to get rid of all that energy feeding back down the coax. But you know what else? It works. I can hit repeaters 30, 40, 50 miles away. It’s way better than a mag mount, and way sleeker than two trunk lip mounts. Plus, it’s something I built myself, and I’m as proud of it as I am of any of my creations.
I hope this inspires more people to look into alternative antenna solutions for when they just can’t/won’t drill. Hopefully this article can be a bit of inspiration for your own mobile antenna projects.
Until next time,
73s!